Two Drawer/Shelf Modern Nightstand | Ana White
Two Drawer/Shelf Modern Nightstand
 |save this plan
Submitted by Ana White
on Wed, 06/27/2012 - 11:16
Difficulty
Intermediate | 
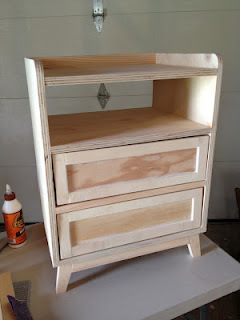
Make a modern nightstand inspired by Land of Nod Monarch! Free DIY plans!
!
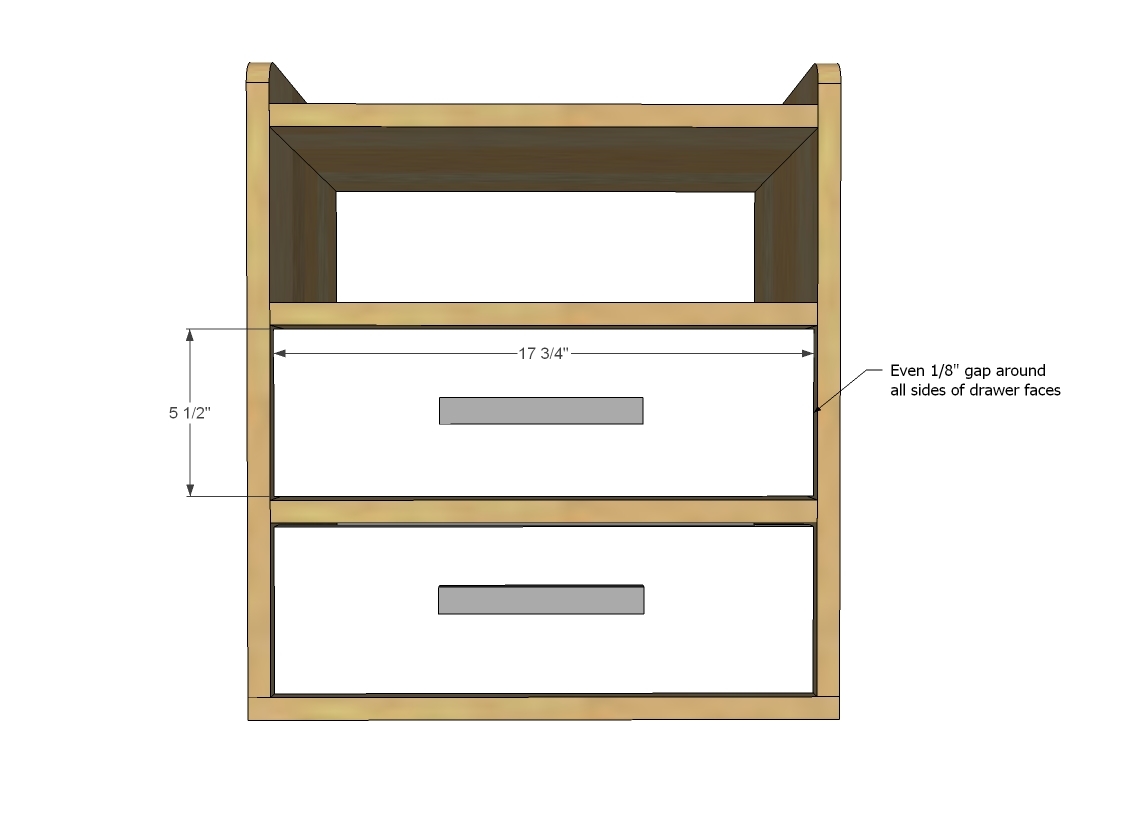
Dimensions
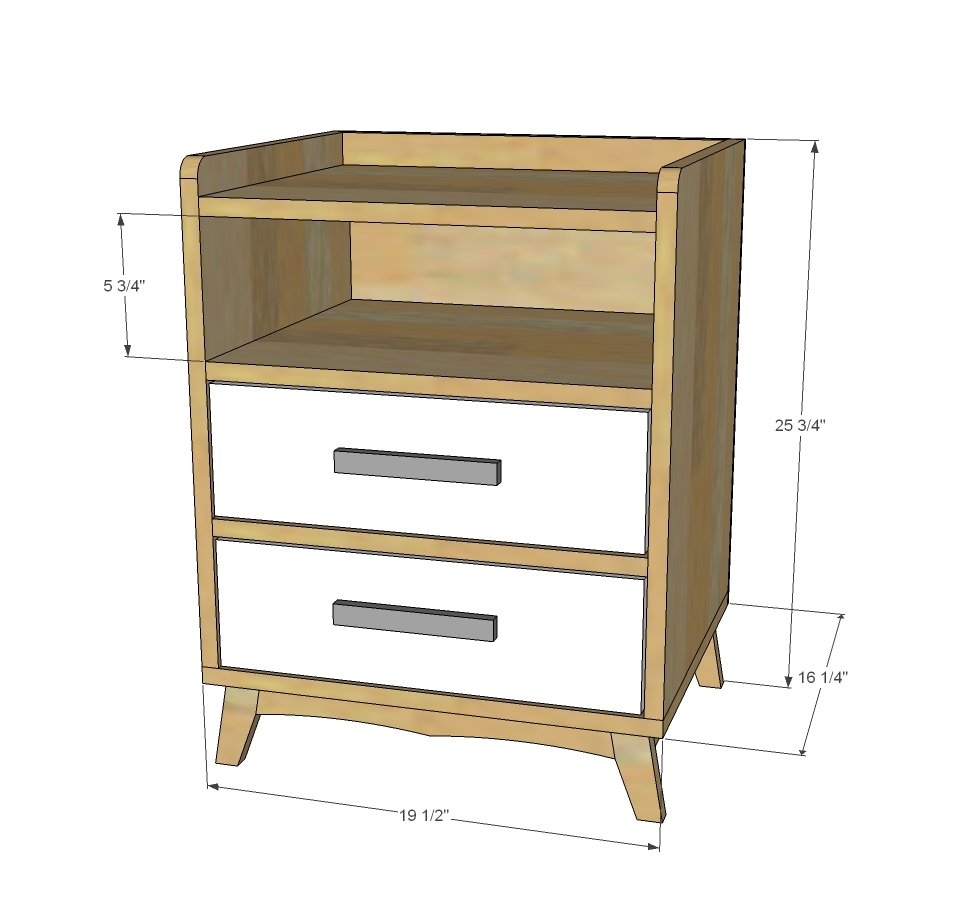
Dimensions are shown above.
Preparation
Shopping List
½ sheet (4x4) of ¾” plywood, ripped in direction of grain in 15 ¾” wide pieces
½ sheet of ¼” plywood
2 – 1x2 @ 8 feet long
2 – 1x4 @ 6 feet long
1 – 1x6 @ 3 feet long
1 ¼” PH screws
1 ¼” finish nails
Drawer hardware
2 – 14” white euro style drawer slides, bottom corner mount
Cut List
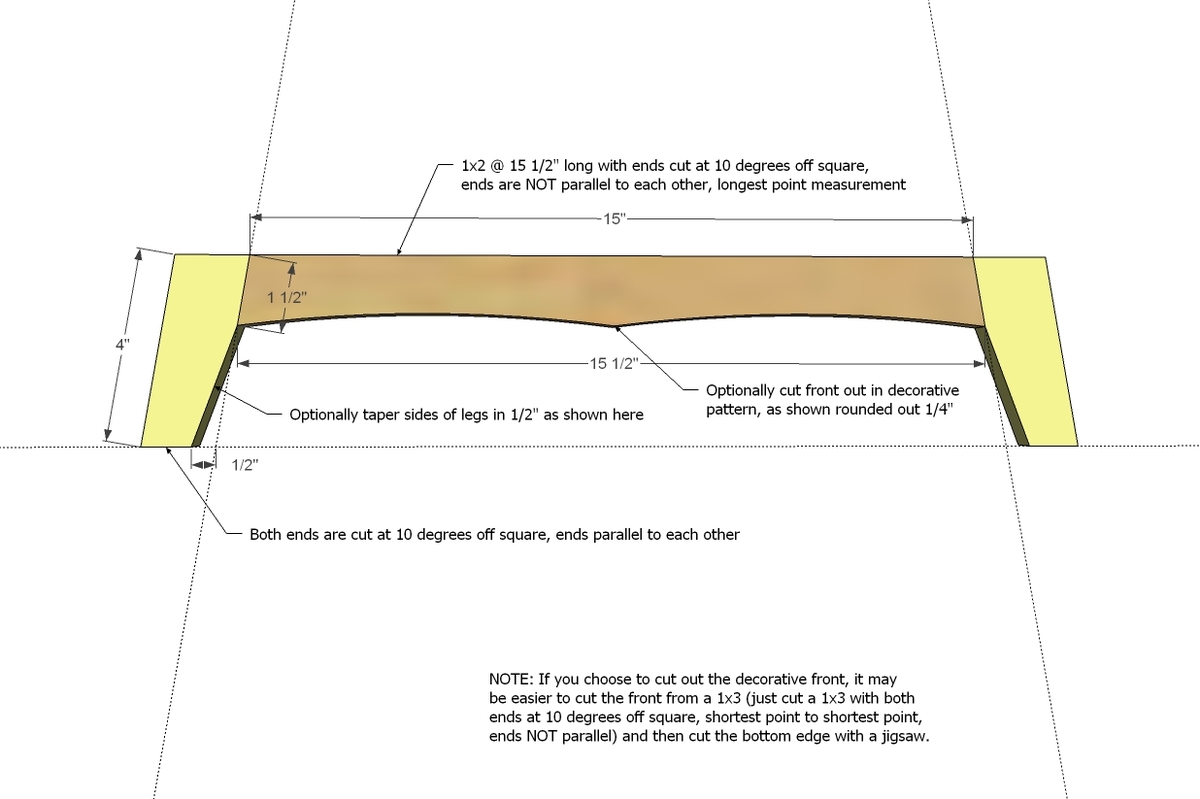
BASE
4 – 1x2 @ 4” (both ends cut at 10 degrees off square, ends ARE parallel to each other)
2 – 1x2 @ 15” (both ends cut at 10 degrees off square, ends NOT parallel to each other)
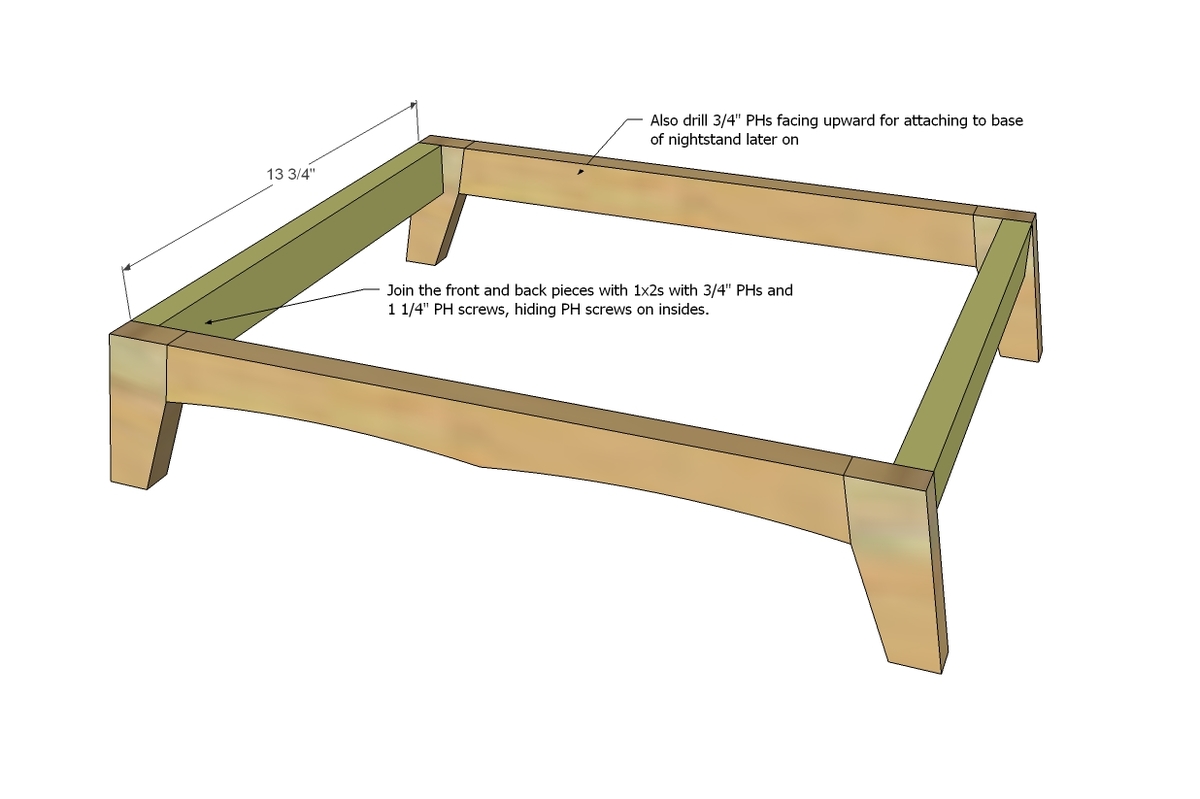
2 – 1x2 @ 13 ¾”
BOX
1 – ¾” plywood 15 3/4” x 19 ½”
2 – ¾” plywood 15 ¾” x 21”
2 – 1x2 @ 18”
2 – ¾” plywood @ 15 ¾” x 18”
1 – ¼” plywood @ 19 ½” x 21 ¾”
DRAWERS
4 – 1x4 @ 14 ¾”
4 – 1x4 @ 15 ½”
2 – ¼” plywood @ 17” x 14 ¾”
2 – 1x6 @ 17 ¾”*
Plan assumes your 1x6 boards are 5 ½” wide
Tools


General Instructions
Please read through the entire plan and all comments before beginning this project. It is also advisable to review the Getting Started Section. Take all necessary precautions to build safely and smartly. Work on a clean level surface, free of imperfections or debris. Always use straight boards. Check for square after each step. Always predrill holes before attaching with screws. Use glue with finish nails for a stronger hold. Wipe excess glue off bare wood for stained projects, as dried glue will not take stain. Be safe, have fun, and ask for help if you need it. Good luck!
Instructions
Step 1
Drill ¾” PHs facing upwards as well in front/back aprons for later attaching to base of cabinet.
Step 2
Don’t forget to drill the ¾” PHs facing upward to attach to base of cabinet later on.
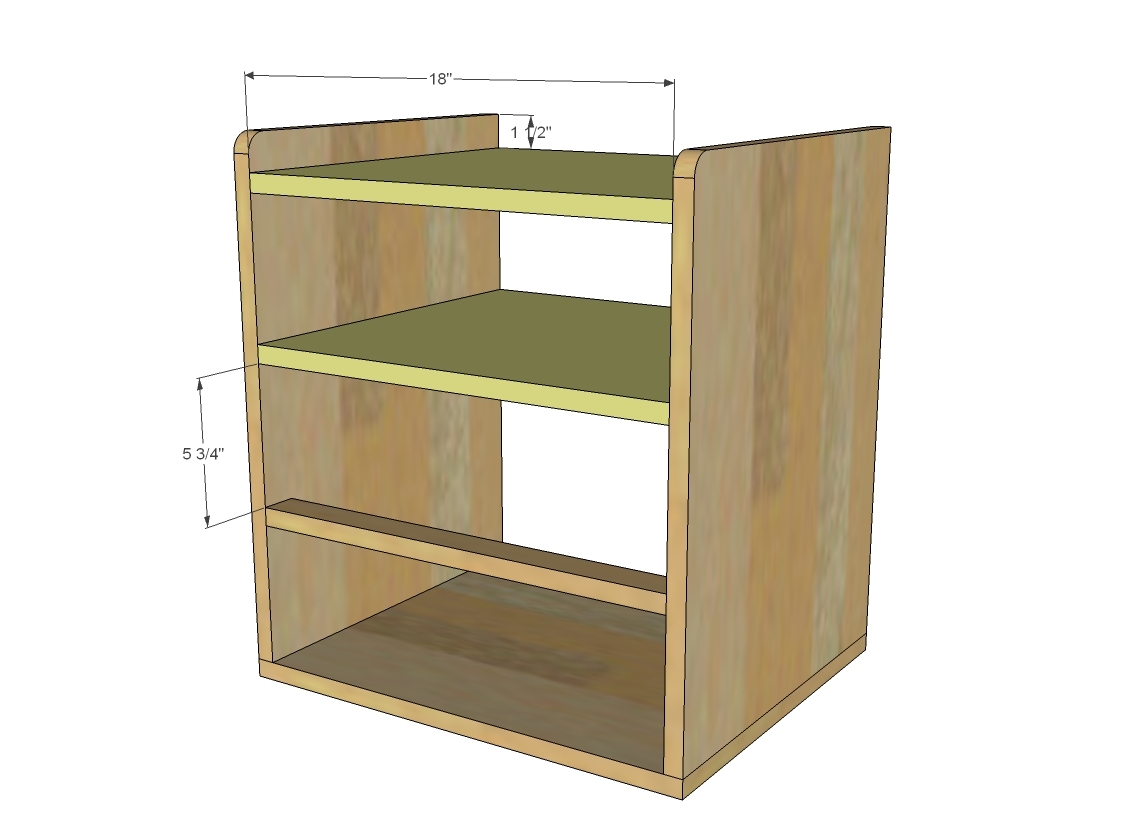
Step 3
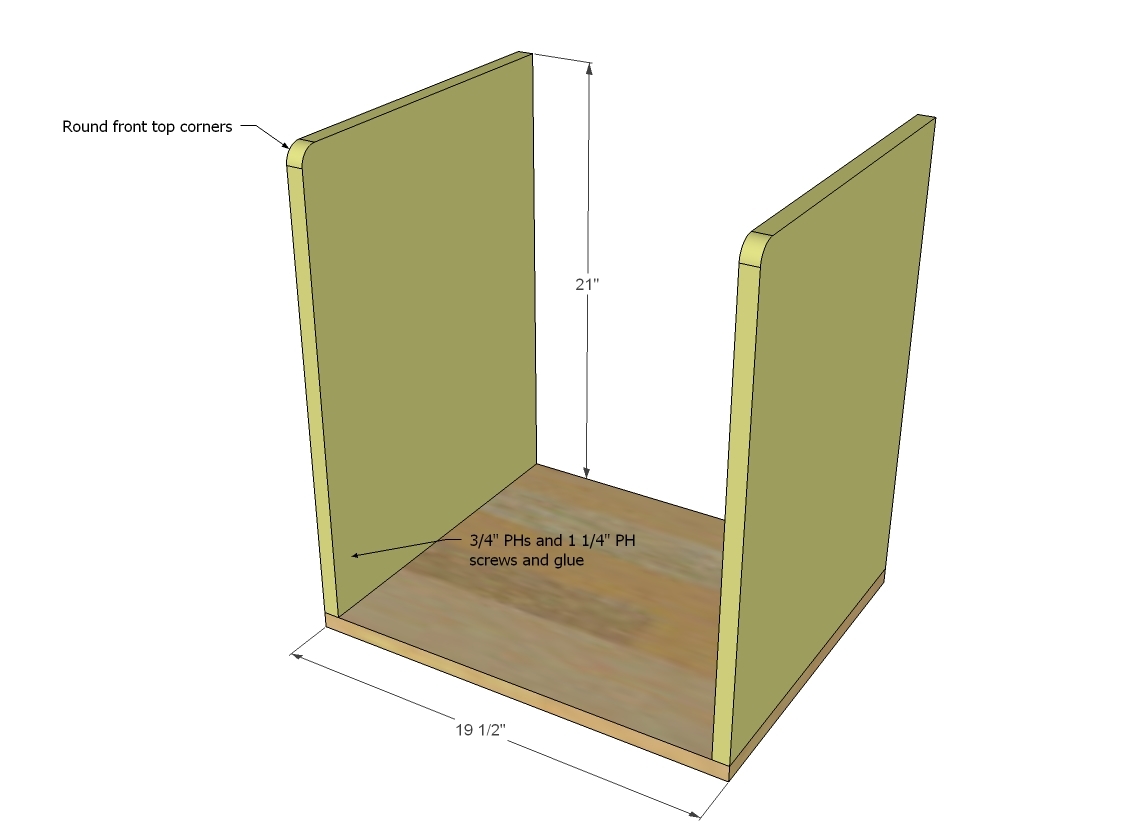
Now we just build a box.
Step 4
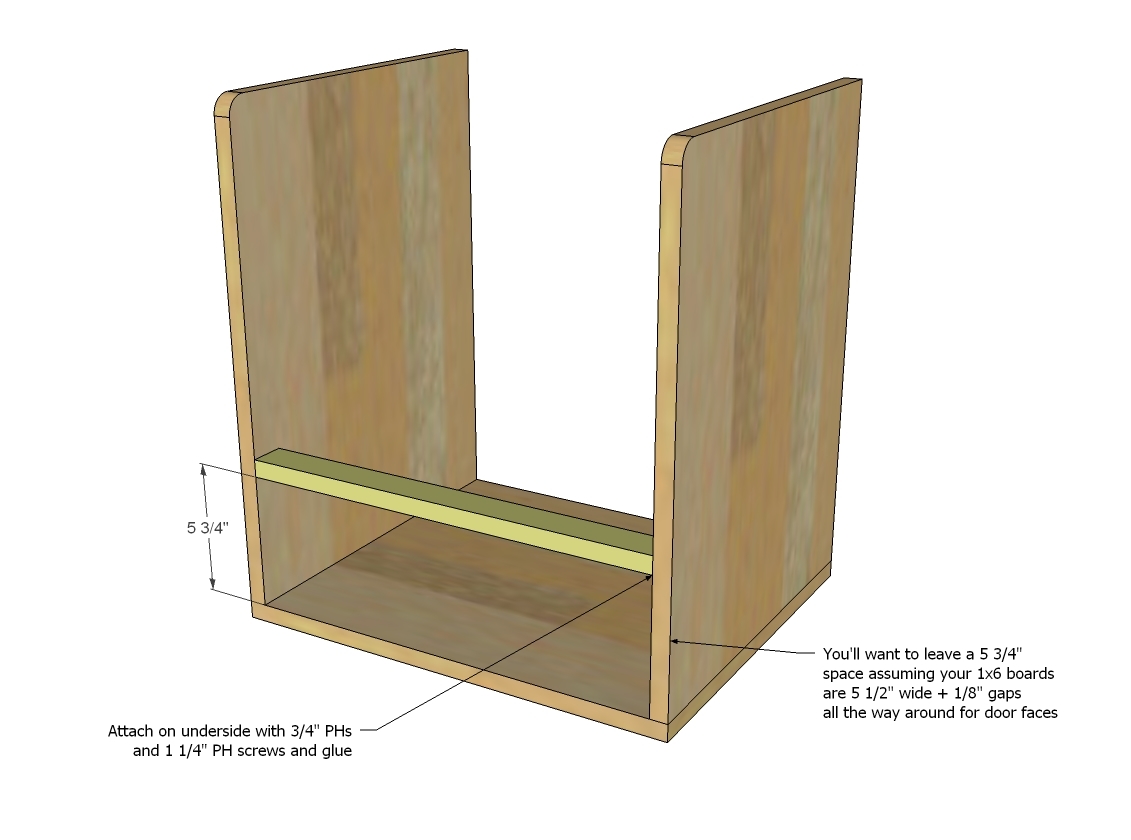
Trim between drawers. Remember, this plan is sized for 1x6 that measure 5 1/2" wide.
Step 5
Step 6
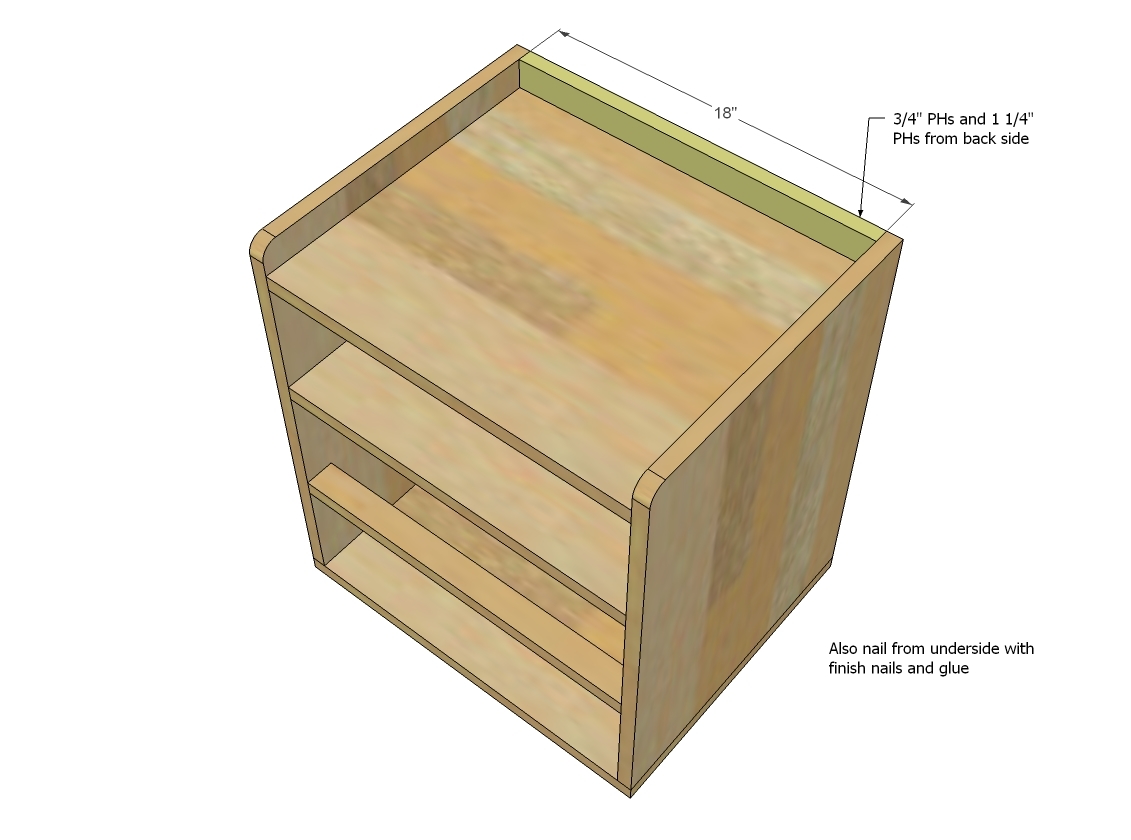
Back trim gets added.
Step 7
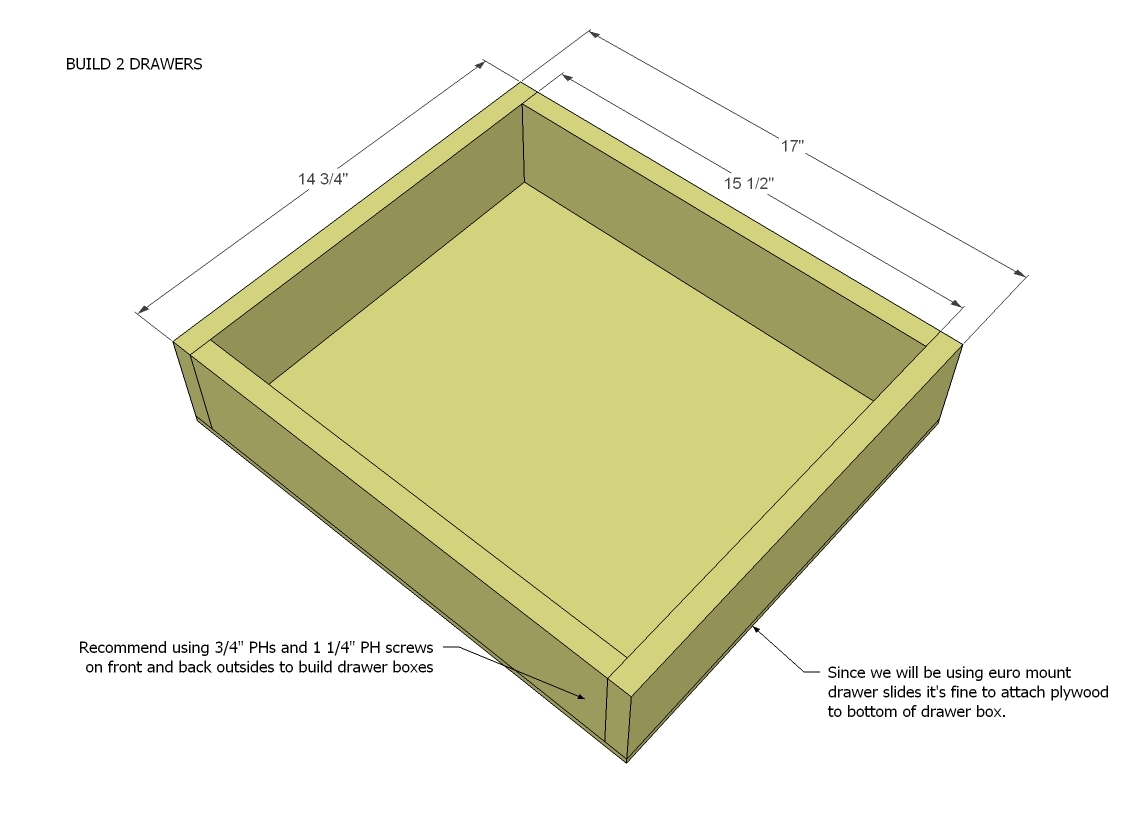
Now build two drawers.
Step 8
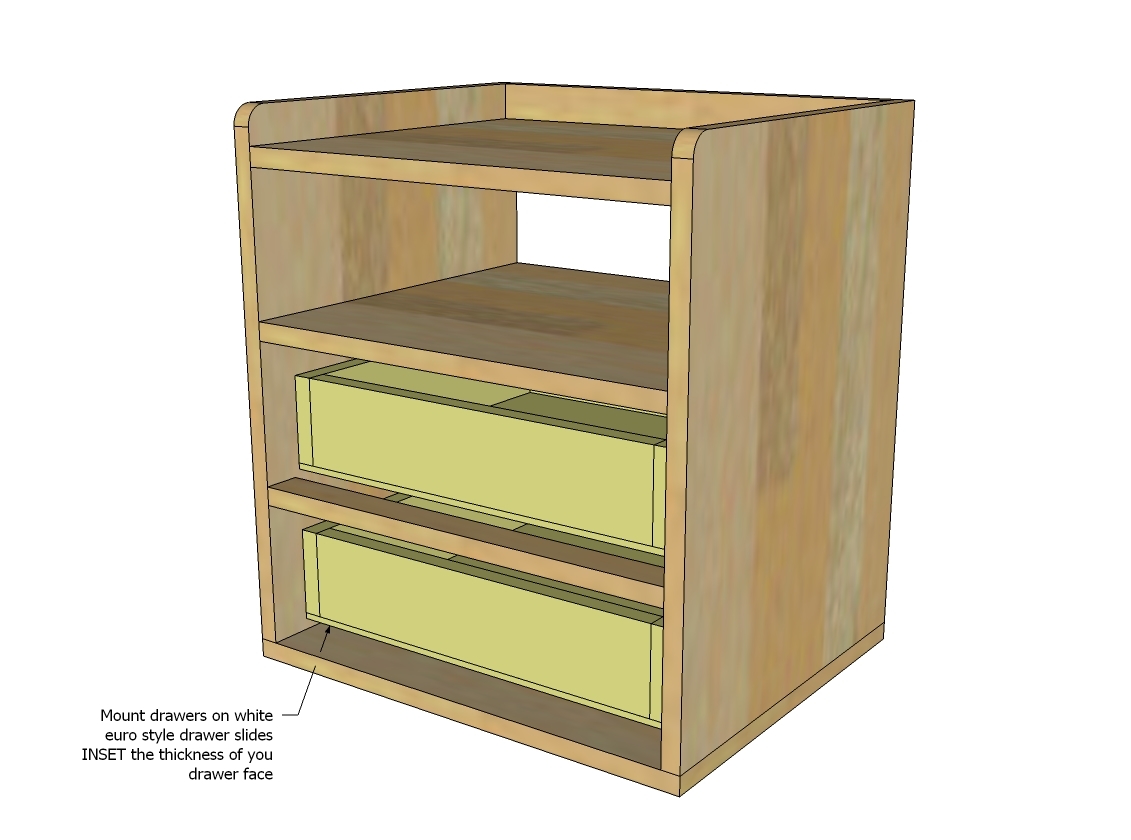
Insert drawers with metal slides.
Step 9
And add drawer faces.
Step 10
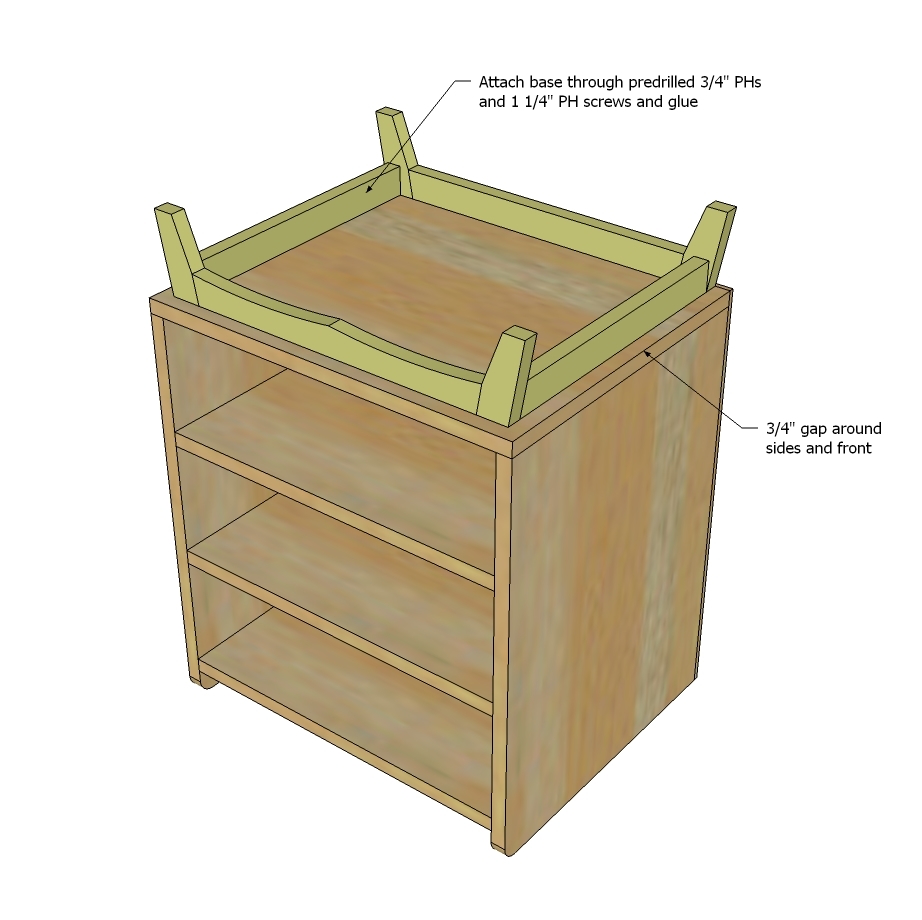
Finally attach bottom!
Step 11
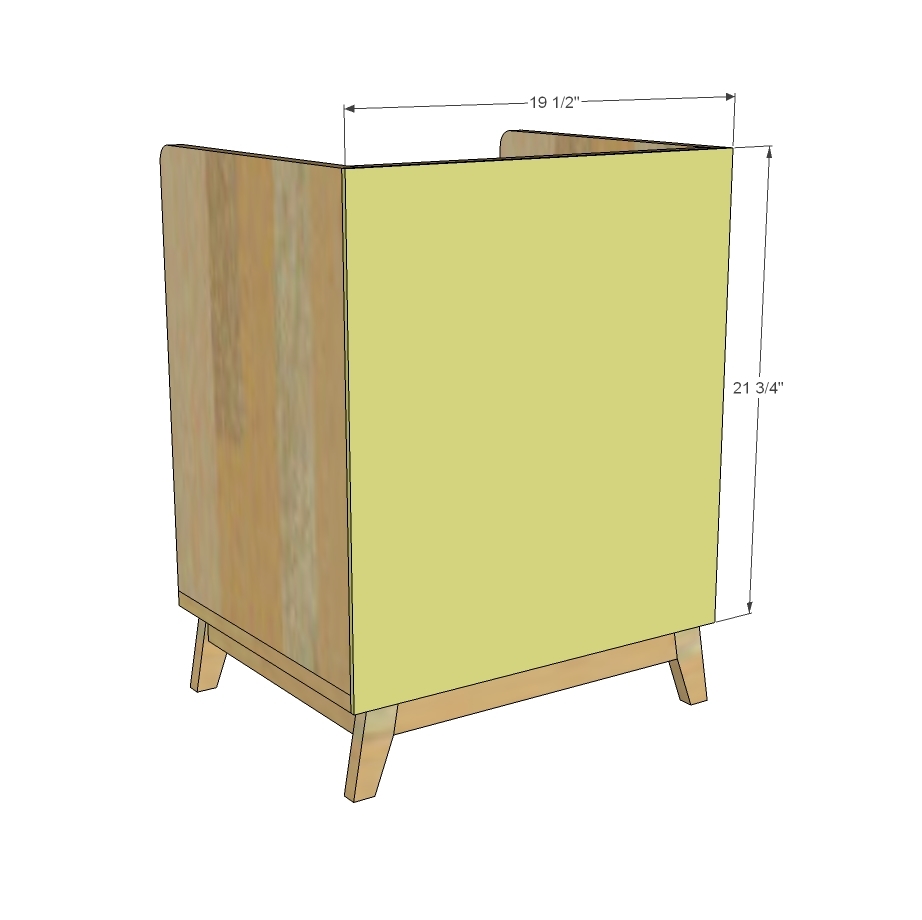
And then the back.
Step 12
Jaime put together a step by step post with lots of building tips and tricks that you must check out.
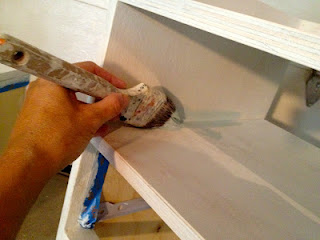
Finishing Instructions
Preparation Instructions
Fill all holes with wood filler and let dry. Apply additional coats of wood filler as needed. When wood filler is completely dry, sand the project in the direction of the wood grain with 120 grit sandpaper. Vacuum sanded project to remove sanding residue. Remove all sanding residue on work surfaces as well. Wipe project clean with damp cloth.
It is always recommended to apply a test coat on a hidden area or scrap piece to ensure color evenness and adhesion. Use primer or wood conditioner as needed.