Wrapping objects with Displacement Maps
Photoshop Tutorial
Displacement maps see like such strange and difficult animals until you learn to tame them. In this long overdue tutorial, I will teach you what you need to know about displacement maps in plain English, so that you can take advantage of the stunning effects that can only be created by using these maps.
INGREDIENTS
by Colin Smith
- Rock texture
- Channels
- Displacement maps
- Lighting effects
- Filters
- Layer Blending modes
- Difficulty 7/10
This page has been shared 43 times. View these Tweets.
1
 |
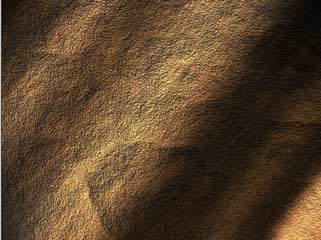
Begin with a texture, you must be in RGB mode. I have another tutorial under textures that shows you how to create this rock surface. You can also just download it if you wish.
2
3
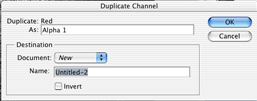
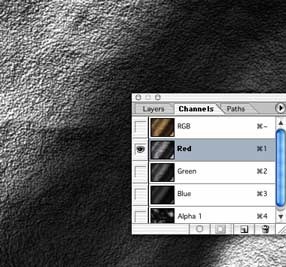
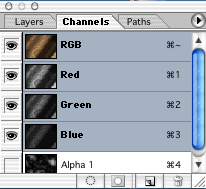
Either right click/Control+click on the channel area of the channels palette, or click on the top right arrow to open the drop down menu. Choose "duplicate channel."
Under destination>document, choose new.
Click ok
4
5
We have now created our displacement map for use later on.
6
7

8
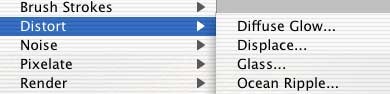
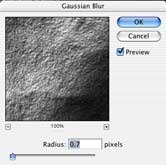
Filter>Distort>Displace
9
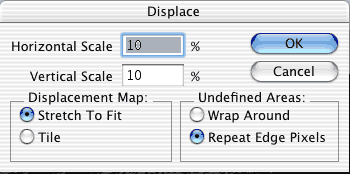
Click ok
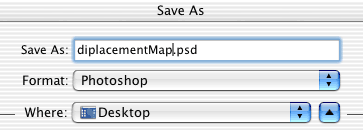
10
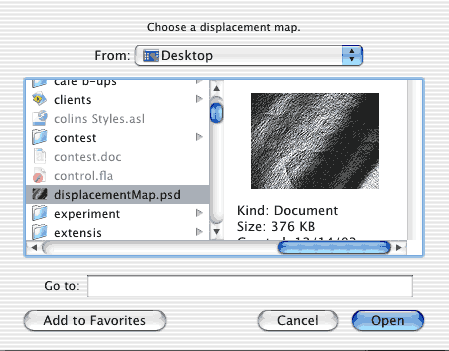
Navigate to the desktop and load the image we created at the beginning of this tutorial.
Click open
11
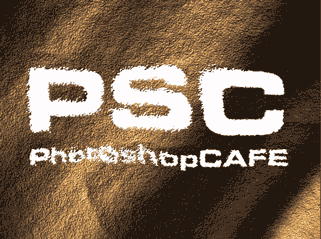
Lets jazz it up a bit.
12
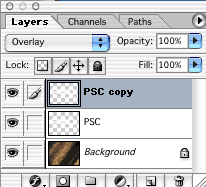
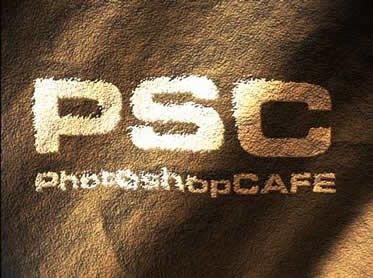
Duplicate the distorted layer to add a bit more strength to the effect.
13
See how the color blends in with the texture.
14
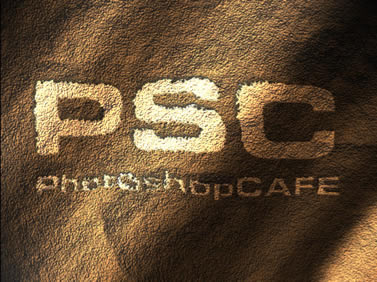
I added an inner shadow layer style to the top layer and dropped the opacity of the second layer to 30%
I hope you had fun with this tutorial and learned a lot.
See you at the cafe
Discuss this tutorial in our forums