← Back to index

Gum Bichromate Workflow 2012 ©

Created: 2022-09-12 11:37  |  Updated: 2025-09-03 21:46  |  Source: https://tonygonzalezartist.tumblr.com/post/16491648522/gum-bichromate-workflow-2


The Gum Bichromate Journal

Gum Bichromate printing and other stuff
www.tonygonzalezartist.com
http://instagram.com/gonoma

Gum Bichromate Workflow 2012 ©

MAKING THE NEGATIVE:

Image↵Mode↵8 Bits/Channel

Image↵Auto Color

Image↵Adjustments↵Color Balance↵-35 Cyan

Image↵Adjustments↵Hue/Saturation↵+30 Saturation

Image↵Mode↵Multichannel

Split Channel

Image↵Adjustments↵Invert

Image↵Adjustments↵Levels↵Auto

Image↵Adjustments↵Curves

Apply Curve:

MAKING THE PRINT:

Using the Cyan negative, I start with two layers of Cyanotype (old Cyanotype formula with 1% Ammonium Dichromate solution for added contrast—6 dropper stems per 20ml of liquid, 10ml A + 10ml B).  I expose enough to achieve slight tone in step 3.

Starting with the Magenta negative I mix equal parts of Ammonium Dichromate sensitizer with Gum Arabic (12 dropper stems of each) and about and inch of pigment (Schmincke Pthalo Blue for the cyan, Permanent Carmine for the magenta and Cadmium Yellow Middle for the Yellow).


SET 1:  I expose and develop enough to achieve slight tone in step 3 and repeat with the Yellow and Cyan negatives.

SET 2:  I then increase the Gum to Sensitizer ratio to 13:11 (for greater contrast) and expose and develop the three layers long enough to achieve slight tone in step 8.


SET 3:  I increase the Gum to Sensitizer ratio again to 14:10 and expose and develop the three layers long enough to achieve slight tone in step 3.

Using the same 14:10 ratio and the Cyan negative I do a short exposure (about 30 seconds) with Lamp Black.

More you might like

Gum Bichromate Journal: Tweaking the Shadow Curve (part 1)

In an ongoing effort to improve the quality of my gum prints I’ve spent the better part of last year adjusting the curve that I use to make the negatives.  Below is the curve used for my last show “Naiads” in 2010 next to the new “2011 curve” I’ve been working on (shown in red).


Keeping the lower end of the curve (representing the shadows) the same, I “pulled” up on the upper portion (representing the highlights) in order to get better separation in the lighter tonal values.
The results were successful in achieving the desired tonal definition in the highlights and this “2011 curve” what I gave my students to use to make their gum prints last fall semester.
Afterwards, I wondered if similar results would occur if I “pulled down” on the curve for better tonal separation in the lower values to produce more “sculptural” shadows.  If it is true, then the question is how much do I “pull down” on the curve?
First, I started by keeping the D-max the same output level as with the 2011 curve (22% black) and lowered the next three points (shown in orange), which would allow for greater density in the darker values of the print.

22% Curve

Input              Output

0————-22

16————44

30————59

44————69

58————76

72————80

86————83

100———–85

I also tried keeping pulling down on the D-max to an output of 19% black while slightly adjusting the other three points.

19% Curve

Input              Output

0————-19

16————44

30————59

44————69

58————76

72————80

86————83

100———–85

I achieved more density in the shadows but at the risk of losing some detail (both color and tone) as shown in the print comparison below (“2011 curve” on the left and the “19 % pulled down curve” on the right).  The shadows appear too abruptly with the “19 % pulled down curve” and doesn’t possess the subtle nuance of transitional values of the “2011 curve”.

In an attempt to find an acceptable middle ground between the two above prints, I will next try “pulling up” the curve so that there isn’t such a dip in the first 4 points.  

The Gum Bichromate Journal: Sizing the Paper ©

For multiple coat gum prints, it’s necessary to preshrink the paper in order to maintain registration throughout the printing process.  Unfortunately, preshrinking removes any sizing when the paper was manufactured.  Resizing the paper involves soaking it in a gelatin bath and then hardening the gelatin onto the paper.

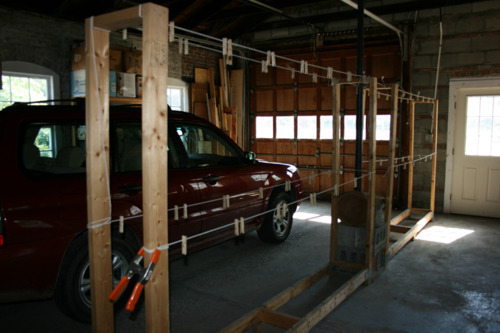
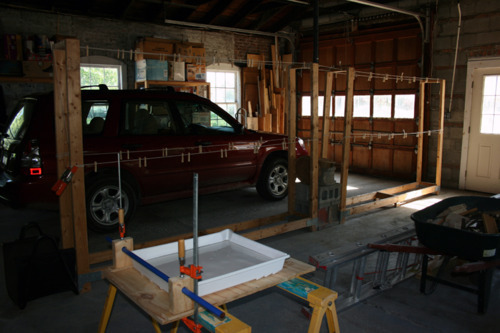
Since it’s such a time consuming and laborious project, I often will size several sheets (20-30) at a time.  I set up a clothesline to dry the paper.  


Preshrinking

I boil water enough to fill a tray a place the paper in the hot water one sheet at a time.  After 10-15 minutes I flip the stack of paper over and remove each sheet individually (first in first out) and hang by clothespins on two corners.

Sizing

Once the paper is completely dry (usually I wait overnight) I combine 6 boxes (each box contains 4 envelopes) of Knox gelatin (available in most grocery stores) with 6 liters of water (one liter per box of gelatin).  While gently stirring, I empty all 6 boxes of gelatin into about ½ of the amount of water and let it sit for about 15-20 minutes to let the gelatin “swell”.  I add the remaining water and heat until about 140° (but not hotter) while stirring constantly.  I pour the heated gelatin into the tray and immerse each sheet (turning each sheet over once to coat both sides).  After about 10 minutes I flip the whole stack over and remove each sheet (first in first out) one at a time and hang to dry.
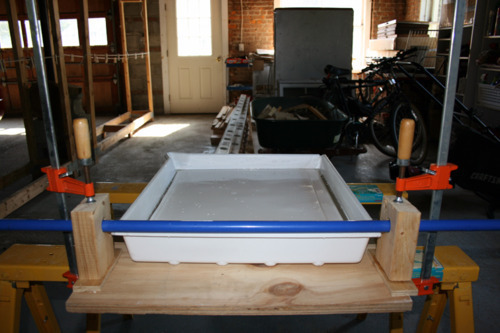
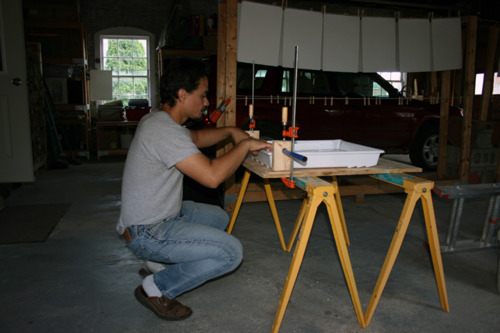
Squeegee

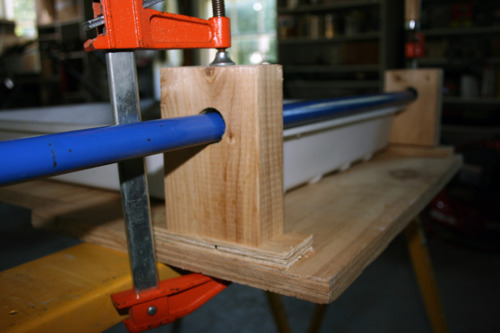
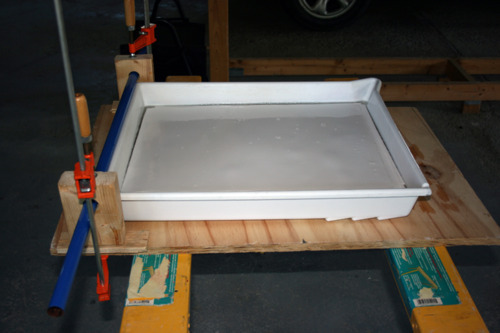
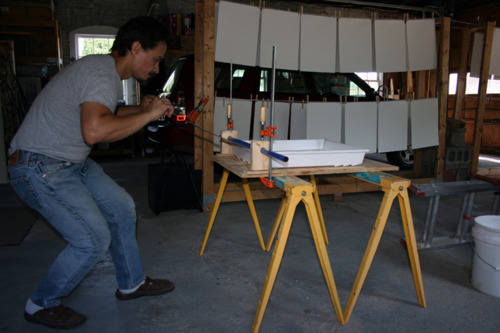
To squeegee the paper involves removing enough of the gelatin to leave an even coat on the paper.  Removing too much is just as bad and not removing enough and will result in an uneven coat, which will cause staining and other problems later during printing.  It takes practice and is a tricky to do alone.  I’ve made a squeegee system using blocks of 2x4, a couple of clamps, and an old mop handle.  Using a hole saw larger than the circumference of the mop handle (to allow it to spin freely), I cut a hole in each 2x4 block at approximately the height of the tray.  

The clamps hold the blocks in place while the mop handle rests slightly above the lip of the tray.  As I pull each sheet out of the tray, I position the tray with enough room to squeegee the paper between the tray and the mop handle and hang each sheet to dry with clothespins on two corners.

Hardening the sizing

Once the paper is dry the sizing must be hardened soon after.  I’ve been using Glyoxal as a hardener for over 10 years instead of Formaldehyde (the US National Toxicology Program recently described formaldehyde as “known to be a human carcinogen Glyoxal is cheap, less toxic and works extremely well (my sizing can hold up to a dozen or more layers) and can be found at Photographers’ Formulary. 

http://stores.photoformulary.com

I mix up about 20 ml of 40% Glyoxal per liter of tap water and sometimes add ½ teaspoon of baking soda per liter.  I fill the tray with the Glyoxal solution and add the paper one sheet at a time while turning each one over to coat both sides.  After about 10-15 minutes I flip the entire stack over a remove each sheet (first in first out) individually and hang to dry with clothespins on two corners.