

Breadboard ends are narrow pieces that are mechanically joined to the ends of a larger panel. The purpose is to support and maintain the rigidity of the panel, while allowing the panel to shrink or expand across the grain.
The Basics:
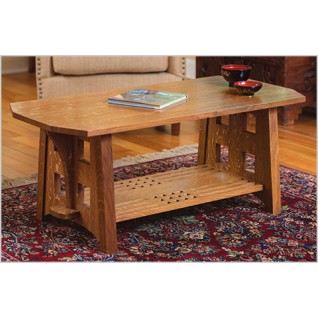
• Tabletops and lids: Large panels benefit from breadboard ends, and the technique is often used in Arts and Crafts-style furniture.
• Anatomy of the joint: Similar to a tongue-and-groove joint but with a lot more complexity.
Tabletops and lids with breadboard ends
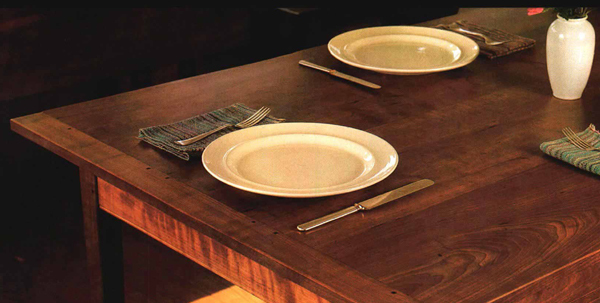
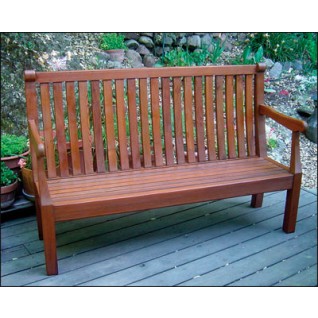
You most often see a breadboard end on tabletops, blanket-box lids, drop leaves, and small solid-wood doors. Any unsupported furniture component that needs to remain flat and intact would benefit from a breadboard end. From a design standpoint, a breadboard end adds an interesting and eye-catching element to a piece of furniture. The narrow strips at each end that run perpendicular to the larger panel finish off and almost frame the panel in a pleasing way. This element helps define the piece and creates a clean and more finished presentation.
Looking at a breadboard end from the edge of the panel you can see how it is mechanically attached to the panel, by means of a sliding dovetail, spline, or tongue-and-groove joint. The method of joinery reveals important and interesting information about the piece’s construction, but also demonstrates the level of craftsmanship invested into the piece.
Since wood moves across the grain seasonally (in warm weather the panel expands, in cold weather it shrinks) and not along the grain, a breadboard end will either fall short of the panel edge or will extend past it, depending on the season. This changing condition is recognized as a sign of good craftsmanship.
Anatomy of the breadboard end joint
The breadboard end is cut in two separate operations and the joinery appears similar to a tongue-and-groove joint. However, unlike the tongue-and-groove joint, the grain on both pieces runs parallel. On the breadboard strip — which typically measures 2 in. to 3 in. wide, depending on the overall thickness, width and length of the panel — a groove is cut along the grain. The end of the panel, which receives the breadboard end, has a tongue cut into the end grain. The parts are joined with mechanical fasteners, usually screws, in slotted holes so that the parts stay joined and are able to move with seasonal expansion.
Generally, the proportions of the joint are determined by the thickness of the material. A good rule is to cut the tongue 1/3 as thick as the material. The length of the tongue should be equal to the thickness of the material. For example, on a 3/4-in.-thick blanket box lid, the tongue should measure 1/4 in. thick by 3/4 in. long. This is not a difficult joint to execute, but the parts should be fitted painstakingly to provide both strength and a good appearance.
The plow along the edge of the breadboard can be cut on the tablesaw using a dado head. On a small panel, the tongue can be cut on the tablesaw using a dado head. On a larger panel, it should be cut with a router, guided by a straightedge or router edge guide.
More from FineWoodworking.com:
- Four Ways to Cut a Breadboard End Joint
- Plans: Trestle Table with Breadboard Ends
- Five Ways to Keep Plank Doors Flat
- Three Ways to Keep Tabletops Flat
Up Next
Discussion Forum
Recent Posts and Replies
-

Unable to purchase Special Issues in FWW App
0 Replies |March 7, 2020 04:57pm -

Correcting Out-of-Square
10 Replies |March 7, 2020 03:35pm -

Bartley collection kit prices
7 Replies |March 7, 2020 03:27pm -

Finishing Both Sides - Hoadley vs. Flexner
1 Reply |March 7, 2020 02:47pm -

shooting board???
3 Replies |March 7, 2020 02:00pm -

Dewalt DW735 does not plane same thickness from one side to the other
10 Replies |March 7, 2020 11:17am
Member Exclusives
Become an UNLIMITED member - Get access to everything Fine Woodworking has to offer!
Upgrade to UnlimitedHighlights
-
Shape Your Skills
when you sign up for our emails
Plus tips, advice, and special offers from Fine Woodworking.
Sign Up -

Shop Talk Live Podcast
Our biweekly podcast allows editors, authors, and special guests to answer your woodworking questions and connect with the online woodworking community.
-
Projects & Plans
Browse our collection of hundreds of quality plans including Shaker furniture, Arts and Crafts pieces, beds, diy plans, chairs, workbenches, tool storage, and more.

Get the latest from Fine Woodworking Magazine
UNLIMITED membership - Get access to it all
Start Free TrialFine WoodWorking
Follow
Newsletter
Get woodworking tips, expert advice and special offers in your inbox
Membership & Magazine
Taunton Network
© 2020 The Taunton Press, Inc. All rights reserved.
Get all that Fine Woodworking has to offer when you become a member. Start your free trial today
Please review our updated Privacy Policy and Terms of Use. By using our websites and services, and transacting business with us, you are agreeing to these new policies and terms.
X