Five Ways To Slice Breadboard Ends
Capping the ends of a solid-wood panel with rails hides end grain and prevents the panel from cupping, all while allowing for seasonal expansion and contraction.
The basics
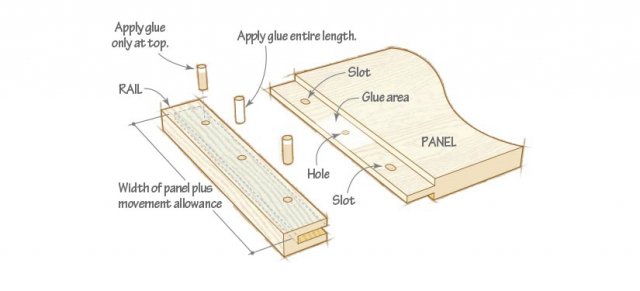
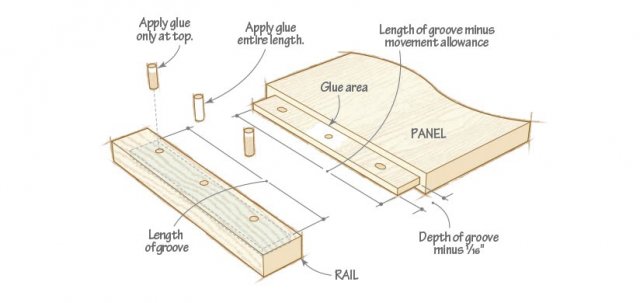
In this article you’ll become familiar with five types of breadboard ends, each with its own purpose and level of complexity. But all breadboard ends share certain traits: Each comprises a grooved rail, typically 2–3" wide, mated to a tongue on the end of a panel. The groove width equals one-third the panel thickness; its depth measures two-thirds the rail width. The rail attaches to the panel tongue with dowels, fixing its center and allowing for wood movement toward the edges.
Plan for wood movement
Learn more about flat-, rift-, and quartersawn boards. woodmagazine.com/logsawingWood expands and contracts most across its width but changes only slightly lengthwise. So, the breadboard rail should be long enough to prevent the panel edges from protruding beyond the rail ends at the most humid time of year. Flatsawn panels move about 1⁄4 " for every 12" of width; quartersawn, about 1⁄8 ". (This accommodates an annual change of 8 percent moisture content—plenty for most parts of the country.) So, for a 24"-wide flatsawn panel built in the dryness of winter (panel at maximum shrinkage), cut the rail 1⁄2 " longer, so the ends protrude 1⁄4 " beyond each panel edge. For the same panel built in summer humidity (panel at maximum expansion), make the rail ends flush with the panel edges.
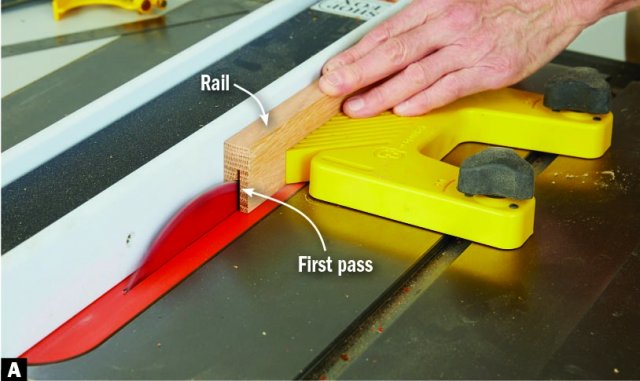
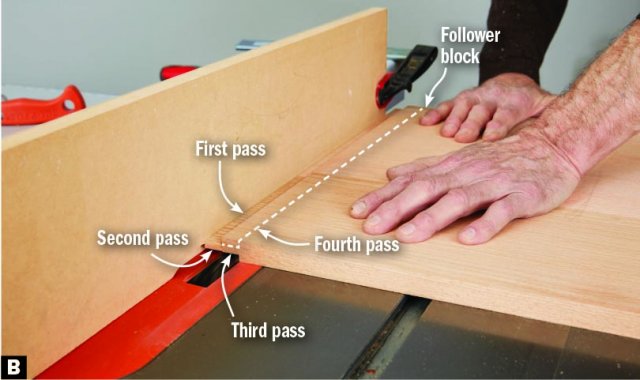
Full-length tongue and groove: Simple as possible
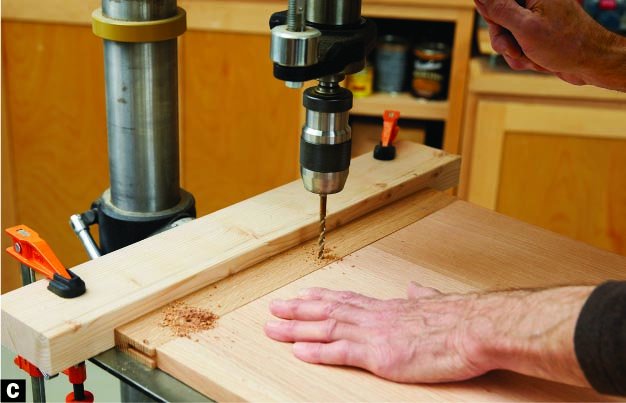
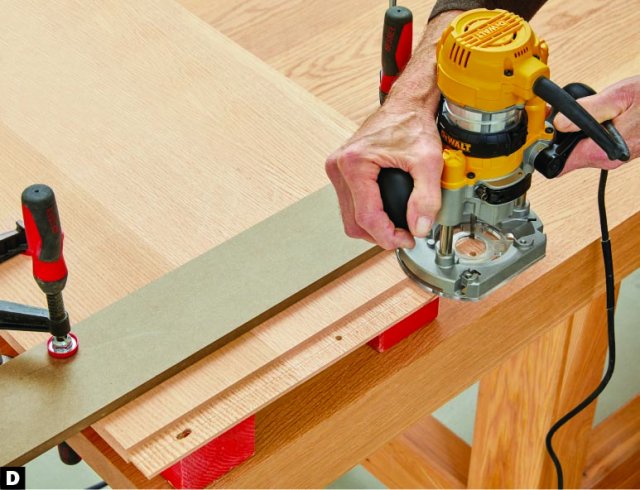
Tip! To ensure a tight-fitting rail, draw-bore the hole and slots in the panel tongue. First, drill only through the rail. Then, fit the rail on the panel tongue and mark the hole centers. Position the router guide to move the hole and slots 1⁄32 " closer to the tongue shoulder; then, plunge the center hole and rout the outer slots. The resulting slight offset draws the rail against the panel as you drive the dowels.
Form a basic tongue-and-groove joint with open ends [Photos A–D]. Tap dowels into place, gluing the center dowel to the rail and panel tongue, and the outer dowels only to one groove cheek. With the glue dry, trim and sand the dowels flush.
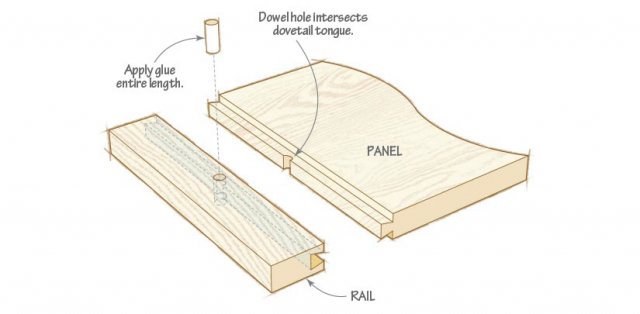
Sliding dovetail: A classic look
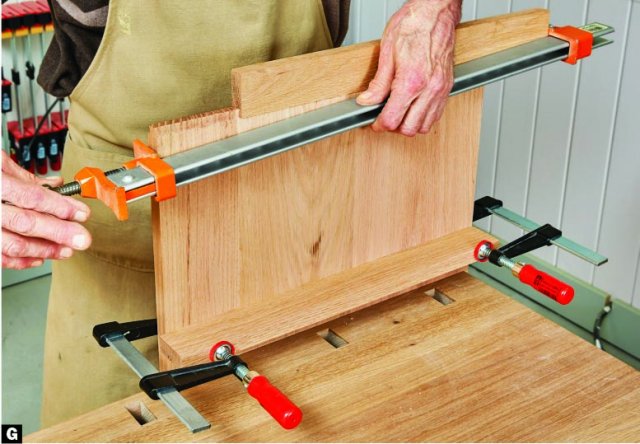
Tip! Even a carefully constructed panel can cup when left to sit. To hold a cupped panel flat, clamp a jointed board to the panel [Photos F and G].
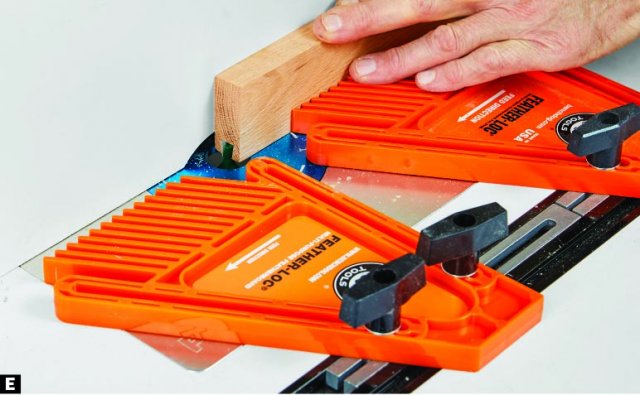
A decorative and structural sliding-dovetail joint requires pinning only at its center. Start by cutting a centered 3⁄16 "-wide groove in the rail, slightly shallower than the height of the dovetail bit [Photo A]. Complete the dovetail groove [Photo E]. Leave the dovetail bit at the same height, move the fence to expose only a portion of the bit, and form a mating dovetail tongue on the panel [Photo F]. Install the rail on the panel [Photo G]. Drill a hole centered on the rail length that intersects the dovetail tongue, and glue in a dowel. Trim and sand the dowel flush.
Note: Sawing a slot in the rail removes excess material, making it easier to rout the dovetail slot while also reducing burning.

Stopped tongue and groove: A clean look
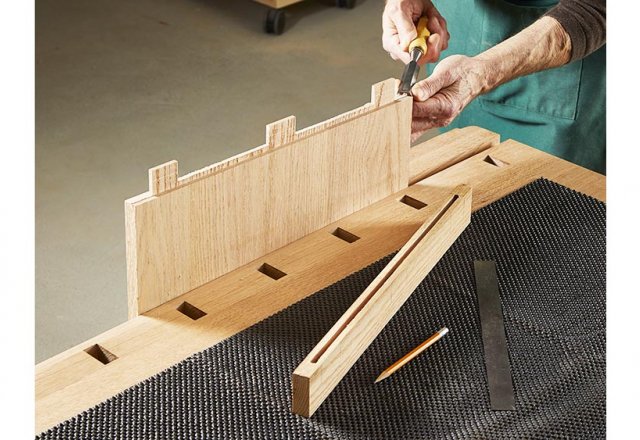
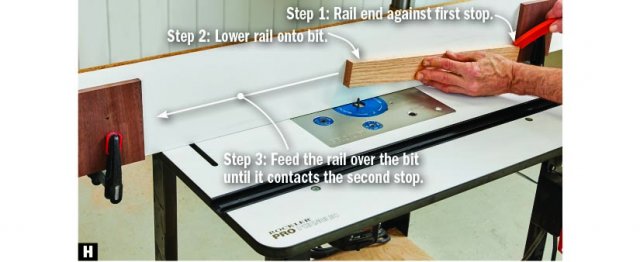
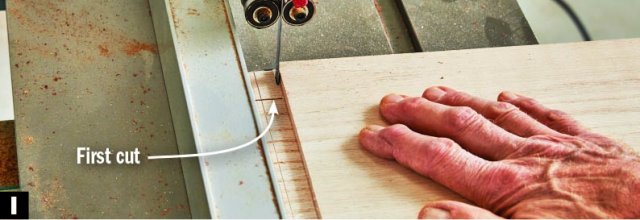
To draw as little attention as possible to the joint, conceal it. First, groove the rail [Photo H]. Form the panel tongue [Photo B] and notch the tongue ends [Photo I]. Pare the notch flush with the tongue shoulder, using a chisel [Opening Photo]. Drill holes, form slots, and install dowels as shown previously.
Mortises and tenons: For wide or thin panels
Tip! Conceal the glue lines by bandsawing the laminations from a single piece of stock thicker than the panel. Then plane them to finished thickness. Add a decorative touch by making the center lamination from a contrasting wood.
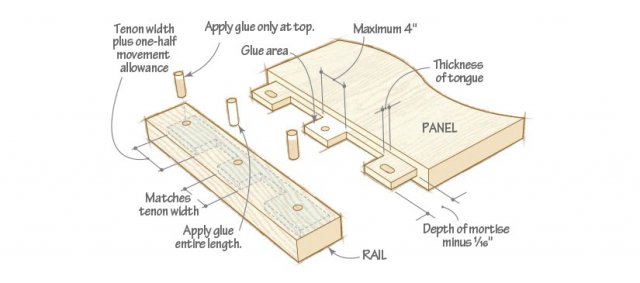
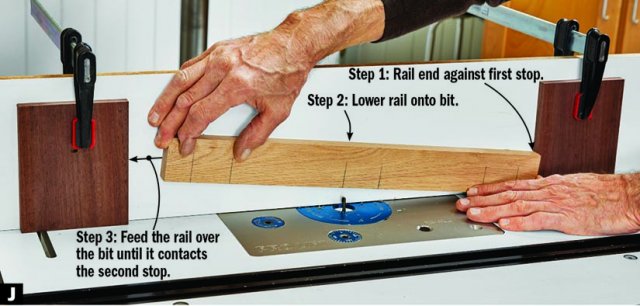
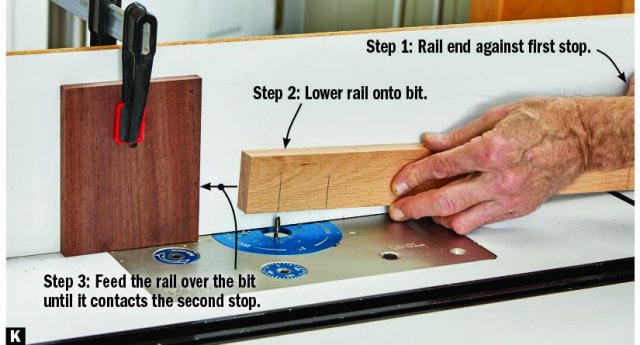
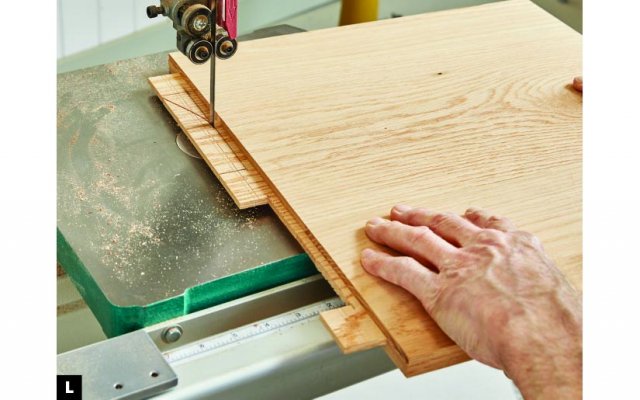
Haunched tenons and mating mortises reinforce the groove cheeks of rails on wide panels (over 24") or when a thin panel (under 3⁄4 ") dictates thin groove cheeks. Start by forming a shallow stopped groove in the rail, using the method shown in Photo H. Without moving the fence, form the mortises [Photos J and K]. Next, form the panel tongue [Photo B]. Then, notch the tongue ends [Photo I, Opening Photo]. Cut the tongue to form haunched tenons [Photo L]. Drill holes, form slots, and install dowels as shown for a full-length tongue and groove.
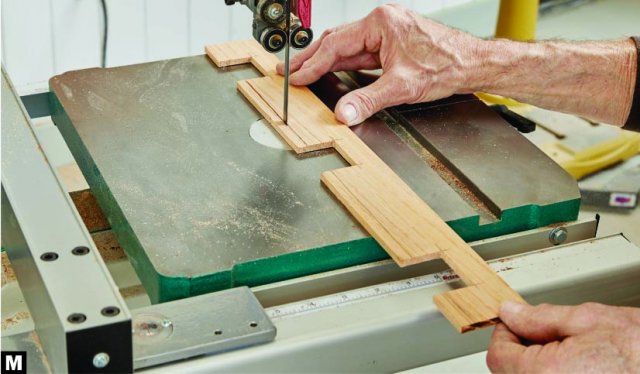
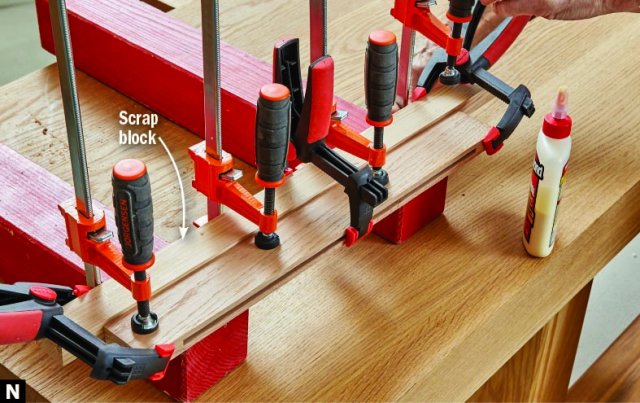
Laminated rail: A simpler route for the rail
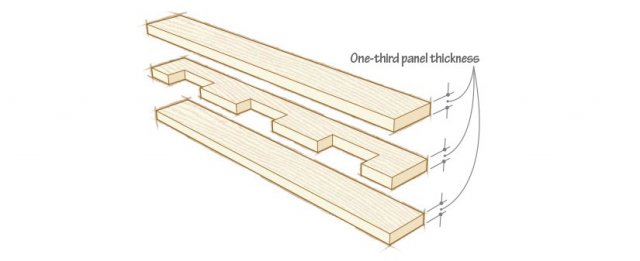
Speed up making the rail for the previous two joints by planing three pieces of stock to one-third the thickness of the panel and slightly wider and longer than the finished rail. Then stack-laminate them [Photos M and N]. (We show laminating a tenoned rail; use the same process for a stopped tongue and groove.) Remove excess glue from the groove and mortises before the glue fully hardens. Joint the rail edges and trim the ends.